Importing fonts
The default font in Kanzi is Fira Sans Regular. It is stored in <KanziInstallation>/Studio/Asset Library/Fonts. When you want to use your own font, import it to your Kanzi Studio project.
You can use these font types in your Kanzi applications:
Make sure that the font you use includes all the glyphs for the text that you want to include in your Kanzi application.
Importing fonts
To import fonts to your project:
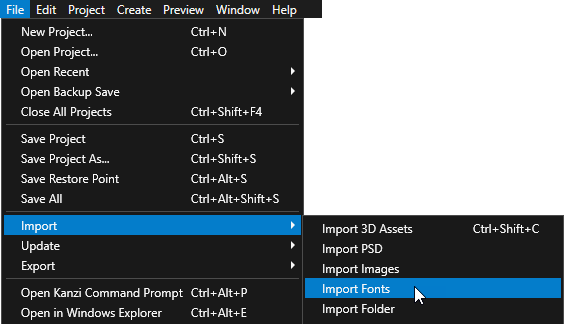
- Select > > Import Fonts.
Import Fonts window opens.
- Select the font you want to import in the Fonts column and in the Typefaces column double-click the typefaces you want to select for importing.
When you open the Import Fonts window, Kanzi Studio shows system fonts. To import fonts from a different location, click Browse and select the directory from which you want to import fonts.
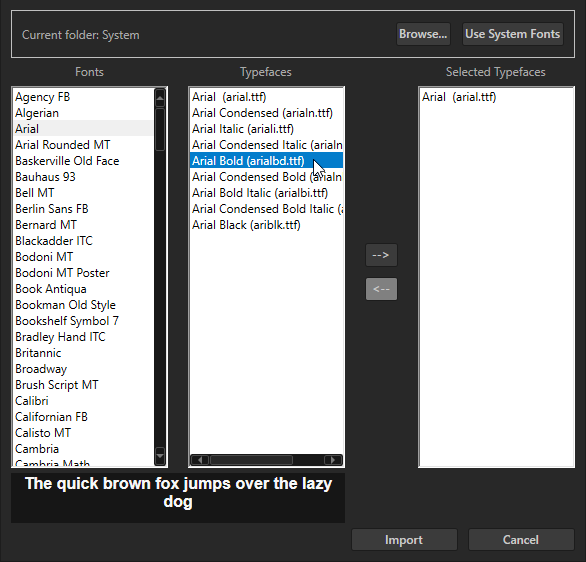
- When you are done selecting typefaces of fonts you want to import, click Import.
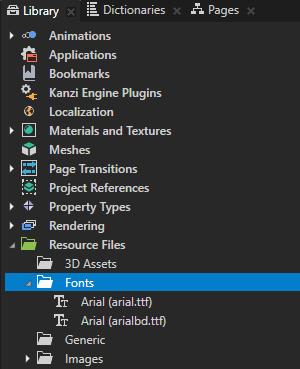
You can see all imported fonts in the Library > Resource Files > Fonts.
Using the iType linked fonts
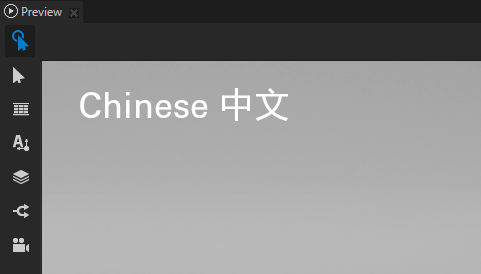
Use the iType linked fonts to link several TrueType fonts and use glyphs from all the linked fonts by referring to a single font file. For example, you can link a font with Latin glyphs and a font with Chinese glyphs to render in your Kanzi application the glyphs used in both languages.
Submit the request for the iType linked fonts support in Kanzi using the Kanzi Support Portal at support.rightware.com.
Requirements
To create iType linked font files, you need Monotype iType FontLinking Kit for iType 5.3.3.
Installing support for the iType linked fonts
To install support for the iType linked fonts:
- Back up your <KanziInstallation>/Studio/Bin directory.
- Extract the zip file which contains the Kanzi Studio Preview and Kanzi Engine binary files that provide support for the iType linked fonts:
- GL_vs2015_Debug directory contains the binary files for the GL_vs2015_Debug build configuration.
- GL_vs2015_Release directory contains the binary files for the GL_vs2015_Release build configuration
- In the <KanziInstallation>/Studio/Bin directory replace the Kanzi Studio Preview and Kanzi Engine binary files with the files you extracted in the previous step.
Using the iType linked fonts
To use the iType linked fonts:
- In Windows Explorer add the ttf font files that you want to link to the <KanziWorkspace>/Projects/<ProjectName>/Application/bin directory.
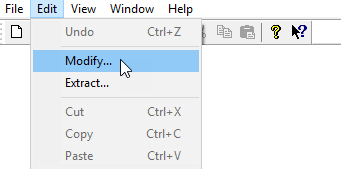
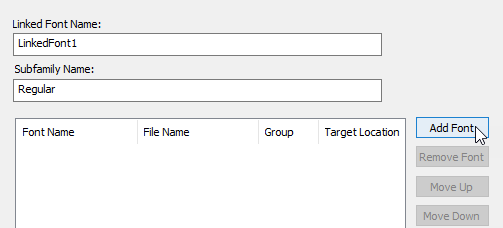
- To create an ltt linked font file, in the iType FontLinking Kit open the FontLinker tool:
- In the Edit menu select Modify.
The Font Link window opens.
- In the Font Link window click Add Font and select the ttf font files you added to the Application/bin directory in the first step.
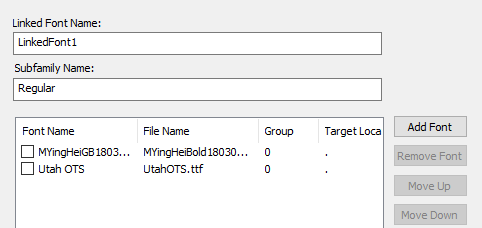
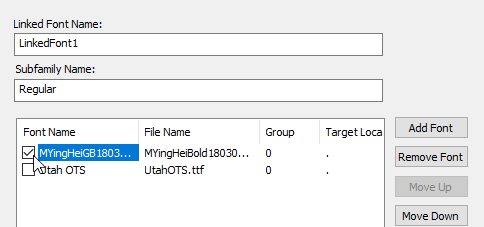
- In the Font Link window for each ttf font file you imported in the previous step enable the checkbox and click Apply. After you add all the fonts that you want to link, click OK.
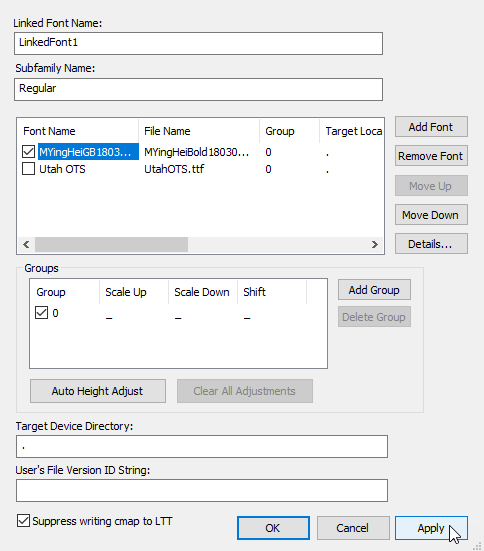
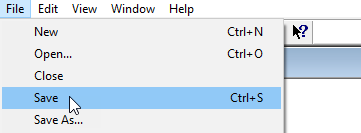
- In the File menu select Save and save the linked font as an ltt file.
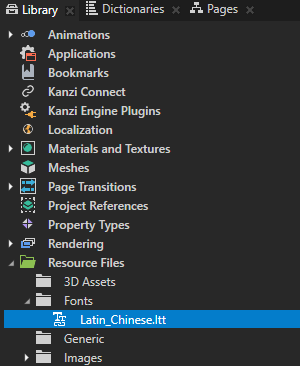
- In Kanzi Studio import the ltt font you saved in the previous step. See Importing fonts.
In Kanzi Studio, you can see the linked font file in the Library > Resource Files > Fonts.
The linked font file in the Fonts directory refers to the ttf font files located in the <KanziWorkspace>/Projects/<ProjectName>/Application/bin directory.
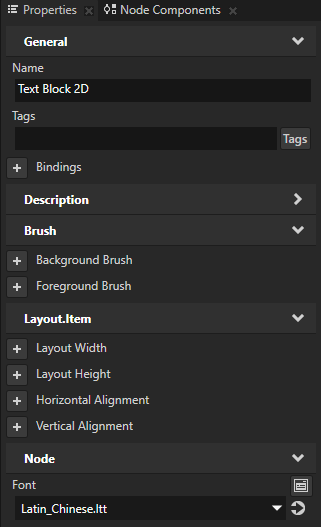
- In Kanzi Studio in the Project select a Text Block node where you want to use a linked font and in the Properties set the Font property to that font.
In that Text Block node you can now use the glyphs from all ttf files that you linked in an ltt linked font file.

See also
Using the Text Block nodes
Localization

Open topic with navigation